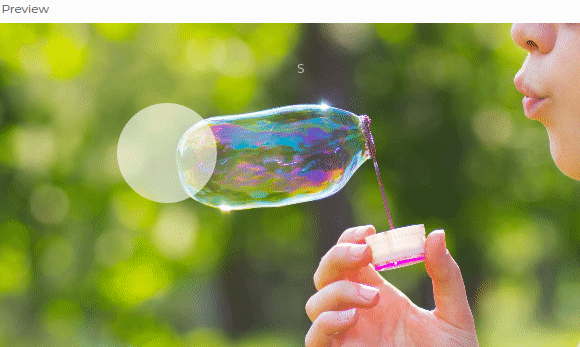
A small challenge to discover functions, create a GIF and remind ourselves that soap can also be used to make bubbles!
Start !A small challenge to discover functions, create a GIF and remind ourselves that soap can also be used to make bubbles!
Start !🗨️ Pour la version francaise, clique ici!
Before you launch yourselves on this challenge, we advise you to complete the following challenges:
First thing, before starting to work on any sort of p5.js project: log in to your account by clicking on "Log in".
Rename your project by clicking on the little pencil .
It may seem silly to say... but dont forget to sign in to your account before starting to work! This will allow you to save your work (your sketches) for free on the servers of p5.js. If you choose not to do this, you must then be prepared to download your files locally (on your computer) and if anything happens to that computer, you risk loosing your work 😢
By clicking here, you will find a preview of what we are going to code. In fact, you just saw the solution to the challenge! Is it cheating? Not at all! Reading the code of more advanced devs is a big part of learning!
This code contains multiple functions. Functions are used to give instructions to the
computer
and they are very useful to avoid repeating the same instructions. You already use a lot of functions in
your programs. color(), for example, is a function that allows the
creation of a colour thanks to the p5.js library
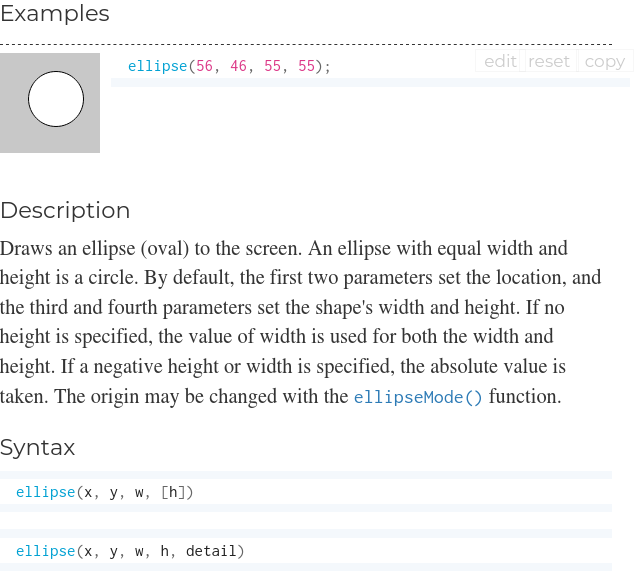
ellipse() is a function that draws an ellipse (or a circle, if the height
and width are equal).
Do you remember the function do draw a line?
Yup, it's line().
You may have noticed that when we talk about functions, we add parentheses () after the name of the function. Functions can take parameters , which we are going to put it in between the parentheses. Here is an example:
textSize(50);
Between the brackets, I added the number 50. This number represents the
size of my text. If, on the other hand, I had coded
textSize(100);
my text would be twice as large! Parameters are important because they can make a big difference to the result of my function.
Some functions take multiple parameters:
ellipse(150, 130, 100);
Here, there are three parameters 150, 130 and 100. Finally, some functions
take no parameters:
noStroke();
The function noStroke() does not take parameters, but we still keep the
parentheses to indicate that if the function took parameters, this is where they would go. And then, for
us devs,
it is a good clue that points to the fact that it is a function (and not a variable, for example).
Most of the time, we use functions that exist already in the p5.js library. color(), noStroke(), ellipse(), etc. are all functions that exist already!
You can always check if a function exists in the p5.js library by searching in the documentation (the documentation, it's like a dictionary that holds all the functions of the p5.js library).
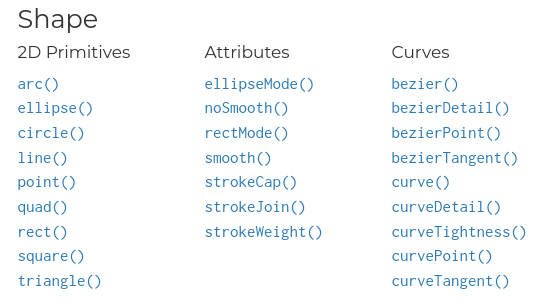
In the documentation, you can click on each function individually to see its description and also some examples.
Starting now, you should always have a tab open on your browser with the p5.js documentation. It's suuuuuuuper useful!
307/5000
Sometimes, we want to code our own functions because they don't exist in the p5.js library or in
JavaScript. In this
case, we must first define our function using the keyword ... careful ... it will be
very
surprising ... the keyword function !
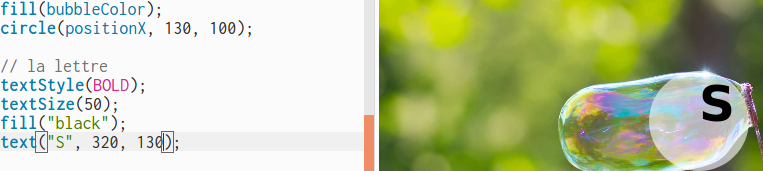
                function drawBubble(positionX, color, letter) {
                fill(color);
                ellipse(positionX, 130, 100);

                // lettre
                textStyle(BOLD);
                textSize(50);
                fill(0,0,0);
                text(letter, positionX-15, 145);
              }
Here, I defined the function drawBubble () with three parameters (positionX, color and letter. I then opened the braces {} and
inside them I put the instructions of my function. Note how I also used other functions
inside my drawBubble() function 🤯
After this long intro, let's go back to our sheep 🐑 🐑 🐑 🐑! Our code contains multiple functions. Sixteen (16) to be precise! Can you find them all? Insert them in the form below and click on Verify.
Do not add the parameters to the functions, but also do not forget to put the two parentheses. Example:
ellipse()
And do not hesitate to refer to the documentation to double-check your answer before clicking on verify...
To give a bit of pep to our animation, we will add an image as a background. Here are the steps:
These steps are very similar to those you followed to change the font in the project predictions
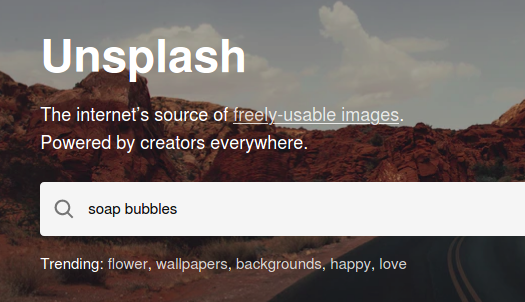
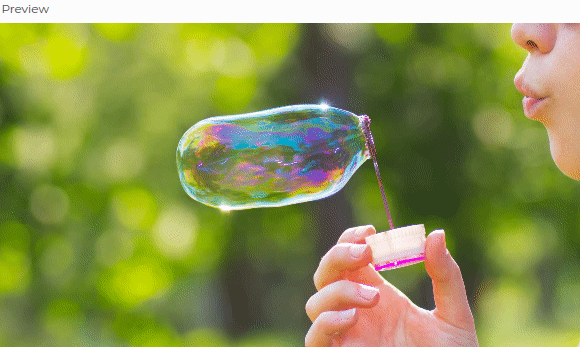
To find a nice image (for free!), you can go to the website Unsplash and type soap bubbles.
If you were so inclined, you could also find an image by going through a search engine of your choice. Download the image on the Desktop of your computer, for example.
To import the image file in your p5.js project, you create a folder in "assets":
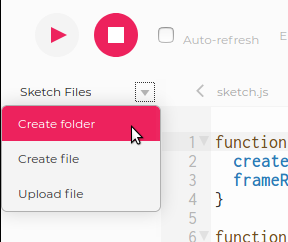
assets, means a place where you can store all non-code files that you will use in your project (images, audio, video, fonts etc). You are not obliged to create an assets folder, but it is a good idea to do so, because one day, your project could have many more images, and you wouldn't want them to be spread out in many different places. Rather you want them all to be within a folder that you can easily navigate in.
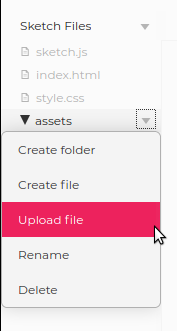
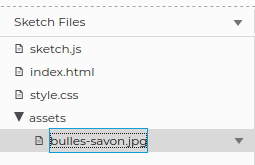
In the assets folder, upload your image.
Last step: the JavaScript! In your code, add the following lines:
              let img;

              function preload() {
                img = loadImage('assets/XXXX');
              }

              function setup() {
                createCanvas(400, 400);
                image(img, 0, 0);
              }
Replace the XXXX by the name of your image file. Remeber to use the same case (capitals letters and small letters) as your file name. We also call this concept 'being case-sensitive'.
If the image is too large, you can change its size with the function resize():
            function setup() {
            createCanvas(400, 400);
            img.resize(400, 0);
            image(img, 0, 0);
          }
Remember, that you can also change the size of the canvas thanks to the createCanvas() function.
You can use the fill() function to give a colour to your bubble.
To display a more 'realistic' bubble, try giving it a slightly transparent colour.
For a transparent colour, you must first find the colour code in RGB (RED, GREEN, BLUE):
rgb(0, 255, 0)
To add transparency (or remove some opacity), we use the RGBA colour code. That is to say, the RGB colour code, in addition with a fourth number between 0 and 1. This fourth number determines the opacity of our colour.
rgba(0, 255, 0, 0.6)
In combination with the color() function of p5.js, we obtain a colour,
which we will
store in a variable bubbleColor and which we will then
use in the function
fill():
              let bubbleColor = color('rgba(0, 255, 0, 0.6)');
              fill(bubbleColor);
Dont forget the quote symbols ' ' around the colour code 'rgba(0, 255, 0.6)' , without which you will get an error!
Good to know: here, you can either use simple quotes ' ' or
double quotes " ".
By taking inspiration from the 8th step of the Pop your balloon! challenge, can you make the balloon move towards either the left or right side?
You will need a variable to store your bubble's position on the x axis. You will also need to change
the value of
the x position each time the draw() function is called (which means at
least about 30 times a second).
Your code could look a little something like this:
                  let positionX = 200;

                  function setup() {
                    // your marvelous code
                  }

                  function draw() {
                    // your marvelous code

                    // to draw the bubble's circle:
                    circle(positionX, 130, 100);

                    // to make your bubble move (replace the ????)
                    positionX ????;
                  }
How to display a letter in the bubble?
You will need the text() function.
If you add this to your draw() function, we will have a
static letter (that is to say a letter that does not move with the bubble):
              function draw() {
                // the rest of your marvelous code

                //to draw the bubble
                circle(positionX, 130, 100);

                // to make the bubble move
                positionX--;

                // to display a letter
                text("S", 200, 200);
              }
Not only does the letter not move along with the bubble, it is also super tiny! We need a magnifying glass to see it properly! 🔎
By consulting the documentation, can you find a function that allows you to choose the size of the text?
It's the textSize() function. The following code will set the text
size to 50:
                  textSize(50);
                  text("S", 300, 50);

You can also put your text in bold thanks to the textStyle(BOLD); function

Finally, change the colour of your text, using the function...
fill()
If you want the colour of your letter to be black, you can use the following in your code: fill("black");
Make sure you have put the functions textSize(), textStyle() and fill()
before
the text() function! It's a good habit to pick up, especially if
at some point later in your code you use the fill() function to
to fill a different shape with a different colour.

To succeed in this step, it is best that our bubble does not move from it's starting position. Which line in your code can you comment-out to immobilize the bubble?
// positionX--;
Now that that is done, will be much easier for you to position the letter inside the center of the
bubble.
By changing the parameters x and y of
your text() function, you should be able to make it!

Question for you: in your opinion, why do you think I picked the values 320 and 130?
Because those are the starting coordinates of my circle's center!
Now that the letter is in the bubble, how can we make it move with the bubble?
Look closely at my circle() function:
circle(positionX, 130, 100);
Notice that in my code, the first argument is the variable positionX.
The computer will replace that variable with the value of the bubble's current position on the x axis.
If we have stored the value 320, the computer will execute the
instruction
circle(320, 130, 100);
If we have stored in the positionX variable the value 69, the computer will execute the instruction circle(69, 130, 100); and so on...
In combination with the instruction positionX--; you get a circle that
moves towards the left.
For your letter, you can do the same thing! Instead of writing text("S", 320, 130); you can replace the 320 with a variable: text("S", ????, 130);.
Which is that variable?
You don't have to create a new variable! You can use one that gives you the position on the x axis...
text("S", positionX, 130);
Let's add a second bubble, tough with a different colour and letter.
In your draw()function, you can start with adding an immobile
bubble.
                  function draw() {
                    image(img, 0, 0);

                    noStroke();

                    // white bubble
                    bubbleColor = color('rgba(255, 255, 255, 0.6)');
                    fill(bubbleColor);
                    circle(positionX, 130, 100);

                    // letter of the white bubble
                    textStyle(BOLD);
                    textSize(50);
                    fill("black");
                    text("S", positionX, 130);

                    // make the white bouble move with it's letter
                    positionX --;

                    // red bubble
                    bubbleColor = color('rgba(XXXX, YYYY, ZZZZ, 0.6)');
                    fill(bubbleColor);
                    circle(320, 130, 100);
                  }
Replace the XXXX, YYYY and ZZZZ with the appropriate values to create the colour red.
How to make the bubble move? We could use the positionX variable,
just like we did for the first bubble:
              // red bubble
              bubbleColor = color('rgba(255, 0, 0, 0.6)');
              fill(bubbleColor);
              circle(positionX, 130, 100);
The problem, is that both our bubbles have the same position on the horizontal and vertical axes... as a result, we see them displayed one on top of the other:

Conclusion: the positions on the horizontal axis (x) must be
independant from eachother. This means we need two different variables.
In your opinion, how shall we create a second variable for our second bubble?
                  let positionX = 320;
                  let positionRedX = 320;

                  function setup() {
                    // the code of the setup() function
                  }

                  function draw() {
                    // first bubble's code

                    // second bubble's code (red)
                    bubbleColor = color('rgba(255, 0, 0, 0.6)');
                    fill(bubbleColor);
                    circle(positionRedX, 130, 100);

                    // make the red bubble move
                    ????
                  }
Can you perhaps guess how we can make the second bubble move?
To make the second bubble move, you can add the following line:
positionRedX--;
We have two variables, but the bubbles are stil on top of each other! And what if the red bubble moved twice as fast as the first one?
Try using this:
positionRedX -= 2;

Well, that does not fix our problem, but at least, both bubbles are independant!
In order for the red bubble to move after the first bubble, we have to use a condition. If the first bubble has already moved some distance, then we can draw the red bubble and make it move. How to translate this into code?
                  if (positionX < ???) {
                  // second bubble's code (rouge)
                    bubbleColor = color('rgba(255, 0, 0, 0.6)');
                    fill(bubbleColor);
                    circle(positionRedX, 130, 100);

                    // make the red bubble move
                    positionRedX--;
                  }
All that remains for you to do is add a letter to the second bubble and the jig is up!
You can now create as many bubbles as you want!
To be sure that the bubbles do not overlap eachother, you will have to create a variable to store the
x position of each one of the bubbles.
You will also need multiple conditions!
Your bubbles are displaying correctly with une letter in each? Awesome! It is now time to refactor (clean the repeating parts) of your code by using... at least one function!
Have a closer look at your code. Which lines are repeated? When there are lines repeating themselves in code, it's ofter a good idea to create a function that contains those lines and we could call (use) that function at multiple points.